Friday, March 30, 2012

Hand Pieced Quilt-A-Long Block #10 ~ Log Cabin

So, I'm a little bummed this is our 10th block and we only have 2 more left. Where does the time go? I enjoy making these and I know I will continue with hand piecing after this. How about you?
This week's block is Log Cabin. Traditionally made with light values on one side and dark on the other with a red center block symbolizing the hearth of the home. I didn't follow the values rule but I did include the red center.I sewed mine ahead of time to make sure all the measurements were correct.

To make the block (6 inch finished) you will need:

1 ~ 1 1/2 in. square - block center ( I used red)

Light Value (I used blue)
1 ~ 1 1/8 x 1 1/2 in.
1 ~ 1 1/8 x 2 1/8 in.
1 ~ 1 1/8 x 2 3/4 in.
1 ~ 1 1/8 x 3 3/8 in.
1 ~ 1 1/8 x 4 in.
1 ~ 1 1/8 x 4 5/8 in.
1 ~ 1 1/8 x 5 1/4 in.
1 ~ 1 1/8 x 5 7/8 in.

Dark Value ( I used pink)
1 ~ 1 1/8 x 2 1/8 in.
1 ~ 1 1/8 x 2 3/4 in.
1 ~ 1 1/8 x 3 3/8 in.
1 ~ 1 1/8 x 4 in.
1 ~ 1 1/8 x 4 5/8 in.
1 ~ 1 1/8 x 5 1/4 in.
1 ~ 1 1/8 x 5 7/8 in.
1 ~ 1 1/8 x 6 1/2 in. 

(click to enlarge)
Sew your pieces together clockwise starting with the light (blue) 1 1/8 x 1 1/2 in. to the center. See picture for order.

Here is my block from last week.

Here are all of my blocks together.

and one for good measure including this week's block. Someone must have thought it needed a little something extra :)

Here are the links for blocks #1-9:


Block #1 ~ Churn Dash
Block #2 ~ Jacob's Ladder
Block #3 ~ Ohio Star
Block #4 ~ Bear Paw
Block #5 ~ Granny Square
Block #6 ~ Shoo-Fly
Block #7 ~ Card Trick
Block #8 ~ Friendship Star 
Block #9 ~ Square in a Square


As always, if you want to join, in all are welcome at anytime! Here is our flickr group! I love all the blocks that are being added to the group pool! They look great. I'm looking forward to seeing more.

Have a great weekend!

Thursday, March 29, 2012

Twins (quilts that is...)

I finished my first, completely-by-hand quilt! I started this quilt with someone in particular in mind. As I was finishing it I realized although it was all hand done, it was not up to par. There are patches where my youngest thought she would imitate me and mark on them with the pencil I used to mark my 1/4 inch seam. I also noticed several "pulls" in the fabric where my knots were too big and they messed up the fabric when I pulled them through. So I decided to make the same quilt by machine for her. It's crisp and nice. I feel so much better sending this one off and knowing it won't fall apart in the washing machine.

Look at the difference in size!! Everything was cut the same. But I guess my ginger pressing and generous seam allowance while piecing made for a smaller quilt with the hand pieced one.

I made a little fabric basket to hold the quilt. I used Ayumi's wonderful tutorial (my favorite) and some of the same fabric from the quilt with linen for the base and handles. I hope she likes it :)

Sunday, March 25, 2012

Hand Pieced Quilt-A-Long Block #9 Square in a Square

This week's block is a square in a square block. Another easy one, perfect for a fussy cut center.


You will need:
4 ~ 3 7/8 in. Half-Square Triangles for the outer square
4 ~ 3 in. Half-Square Triangles for the inner square
1 ~ 3.5 inch square for the center


Sew the long side of the inner square half-square triangle onto each side of the center square.

Sew the long side of the outer square half-square triangle along each edge of the square. That's it!

Here is my Friendship Star block from last week.

Here are all of my blocks together so far.

Here are the links for blocks #1-8:

Block #1 ~ Churn Dash
Block #2 ~ Jacob's Ladder
Block #3 ~ Ohio Star
Block #4 ~ Bear Paw
Block #5 ~ Granny Square
Block #6 ~ Shoo-Fly
Block #7 ~ Card Trick
Block #8 ~ Friendship Star

If you haven't yet, come join our flickr group. All are welcome at anytime! I am looking forward to seeing your blocks and thank you so much for your patience with me in getting this week's block posted :)

Saturday, March 24, 2012

I Was in the Woods...

I was, quite literally, whisked away to enjoy some beautiful, warm, summer-like weather during a mid week camping trip (didn't even have time to gather my hand sewing). It was restful and beautiful and hard to leave. No electricity, no running water, no computer, no i-pod, no traffic. A few days of animal watching and star gazing. Pure bliss.
I'll post the Hand Pieced Quilt-A-Long block within a few days. Sorry for the delay.
Have a lovely weekend!

Sunday, March 18, 2012

Finally...Hope Valley Flying Geese Pinwheel

I finally finished my Hope Valley Flying Geese Pinwheel quilt. This quilt has been a couple of years in the making. I'm glad I picked it up and started working on it again because I majorly ♥ how it turned out! My huge list was such  motivation for me to really get going with my forgotten projects. I was going to bind it in orange but this print from the Hope Valley collection looked good with the front and back so I went with it. Going now to snuggle under it with a hot cup of tea on this misty, rainy morning.

Have a happy, restful Sunday :)

 ☆ Because a few people have asked, here is how to make a Flying Geese Pinwheel block, make 4 flying geese units, cut 4 pieces of background fabric the same size as your flying geese units, sew the background rectangle to the flying geese unit along the "point" side. Arrange units like a pinwheel. Easy Peasy! I used 3.5 x 6.5 inch Flying geese and background pieces.

Linking up with {sew} modern monday and Quilt Story for Fabric Tuesday.

Friday, March 16, 2012

Hand Pieced Quilt-A-Long Block #8 Friendship Star


If you are looking for the Farmer's Wife Tutorial it's here

☆ 

***edited to add better pictures***

I chose an easy block this week. In my opinion Friendship Star has to be included in a sampler quilt. It's one of the first blocks many quilters learn to make for practicing those Half-Square Triangles (HST). It's simple and pretty.

You will need:
4 ~ 2 1/2 inch squares from background fabric
4 ~ 2 7/8 inch half-square triangles from background fabric
4 ~ 2 7/8 inch half-square triangles from print fabric (star points)
1 ~  2 1/2 inch square block center (can be the same print as star points or not, fussy cutting could be a good idea!)

Sew your HST (half square triangle) units together to make 4 of them.

Lay your block out. Sew into rows.

Sew rows together.
This may be the easiest block we have made so far.


Here is my Card Trick block from last week (boy, where did that week go?)

And here are all of the blocks so far.

If you haven't yet come join us over at our flickr group! As always...All are welcome to join in at anytime!!!

Here are the links for blocks #1-7:
Block #1 ~ Churn Dash
Block #2 ~ Jacob's Ladder
Block #3 ~ Ohio Star
Block #4 ~ Bear Paw
Block #5 ~ Granny Square
Block #6 ~ Shoo-Fly
Block #7 ~ Card Trick

I can't wait to see your blocks.

Have a great weekend! Happy sewing!


Farmer's Wife in Your Life - Letter Holder


I'd like to thank Sunni for asking me to participate in this really fun blog hop. I love all of the different projects everyone has made so far. I am very happy to be apart of it! 
I had a few different ideas for what I wanted to make for this series. I decided to make something that was practical and easy. And I have needed one of these for ages. 


I made a mail / bill / letter holder. It is really easy to make and I hope you enjoy it! So let's get organized!

You will need:
3 ~ 6.5 inch quilt blocks
3 ~ 6.5 x 8.5 inch pieces of fabric that coordinate with your quilt blocks
3 ~ 6.5 inch pieces of batting 
1 ~ 6.5 x 25 inch piece of batting
3 ~ 6.5 inch squares of fabric for quilt block backing
1 ~ 6.5 x 25 inch piece of fabric for organizer backing
3 ~ 2 1/4 inch X WOF (width of fabric) strips for binding
Baker's twine, ribbon or binding for a hanger (not pictured)

Make or use any orphan quilt blocks that measure 6.5 inches.

First you will layer the quilt block, 6.5 inch batting and 6.5 inch backing.

Quilt as desired. 

Now sew your binding and use some of it to bind the top of each block. I sew the binding to the back of the block and fold it over to the front. 

Then top stitch it down.

Now we are going to sew the quilt blocks onto their coordinating 6.5 x 8.5 inch fabric pieces.

Top stitch 1/8 of an inch away from the edge on both sides. Do this for all of the quilt blocks and their coordinating fabrics. Trim any extra binding and threads away from blocks.

Next arrange your blocks vertically the way you like them. Now sew the bottom block to the middle block. The seam will sort of naturally go toward the background fabric (away for the middle block). Press the seam down toward the bottom block.

Now sew the top block to the middle block. Press the seam down toward the middle block.
Next layer the 6.5 by 25 inch batting and backing with the quilted pockets and top stitch about 1/8 of an inch away from the seams that you pressed down...

here...

and here.

Also sew about 1/8 of an inch from the top and bottom of the organizer to hold things in place. Then trim away any excess batting and backing.

Now, starting at the top of the organizer, bind the organizer. Making sure to insert your hanger at the top before finishing off the binding. Place the hanger downward on the backside of the organizer between the binding and backing fabric. Be sure to keep it out of the way as you finish off your binding. I used a quadruple folded piece of Baker's twine. 

And that's it! Your finished and now have a one super cute mail / bill / letter holder organizer thing :) As you can see I did not put mine in it's permanent place yet.

maybe here... 

If you have any questions let me know. I hope you enjoyed this little tutorial. Don't forget to check out the other tutorials that have been and are still to come. And there is a Linky Party contest at the end of the Blog Hop. The info is below....


It starts with a preview post on Jolly Jabber on March 4th! 

Here's the schedule.


Inspiration and Tutorials from Designers


Blog Hop


Week 1


March 4-Sunni is guest-posting on Jolly Jabber


March 5-Love Affair with my Brother


March 8-Love Affair with my Brother


Week 2


March 12-Mommy for Reals


March 13-A Colorful Life


March 14-It's Sew Kiki


Week 3


March 19-Love Affair with my Brother


March 23-Love Affair with my Brother


Linky Party


Linky Party will be open from March 24-31 with 2 winners announced the next week. You can link up any project that is inspired by The Farmer's Wife Sampler Quilt and uses between 1-9  6" finished quilt blocks. The blocks do not have to come from the book. 

Please link up a blog post or Flickr photo for your entry.


Judges


I just nearly died when both of these amazing ladies agreed to act as judges!


Laurie Aaron Hird, author of The Farmer's Wife Sampler Quilt


Michele Foster, Quilting Gallery


Sunni Bolger


Prizes


Cosmos - Fat Quarter Bundle Complete Collection by Dan Bennett  Fabric Quilt Cotton


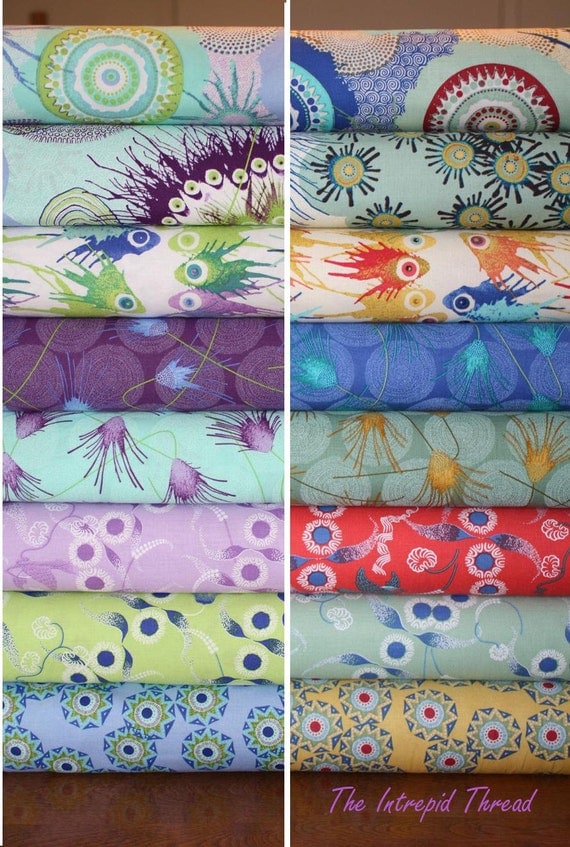
The Intrepid Thread is sponsoring a FQ bundle of the amazing Cosmos by Dan Bennett for Rowan.


Fat Quarter Shop is sponsoring a FQ Bundle of gorgeous Poetica by Pat Bravo for Art Gallery Fabrics.


Looking forward to seeing what everyone makes!!!

Wednesday, March 14, 2012

WIP Wednesday - 3/14/2012 (The One Where I Need Binding Help!!)

I feel like I didn't make much progress in the WIP department this week. I showed you the Swimming Sisters quilt already. I was really happy to finish that and it felt good to quilt something!!!

I also finished up my project for the Farmer's Wife in Your Life blog hop. Here 's a little sneak peak.  My tutorial is this Friday.

I'm working on my hand pieced block for this week. I realize my green sprouts are not directionally correct but I am working with scraps and I just cut where I could. Altough I have a bit of the new FMF coming my way so I may rework this one (if the direction thing  starts to bother me and if the greens look enough alike). I will still be putting up the new block Friday. I'm going to try that auto draft thing blogger has. So I can prepare ahead of time for 2 posts in one day :)

Here is the project taking most of my attention right now. This hand pieced quilt. I'm attaching the binding and it just doesn't seem right to me. I originally chose the pink with polka dots. Then decided I needed something darker to frame it. I thought the brown would be good because of the brown center block. But now I really feel like the pink would look better and keep with the overall soft look. I don't know, what do you think? Brown, pink, neither?

So this week's stats are:
1 completed quilt
1 small project completed
hand pieced QAL (working on it)
hand pieced quilt - finished hand quilting working on hand binding ( when I decide on color)
no progress on other WIPs...


WIP Wednesday at Freshly Pieced

I'm linking up with Freshly Pieced for WIP Wednesday.

See ya back here Friday for my Farmer's Wife blog hop tutorial and hand pieced quilt-a-long block!
>

LinkWithin

Related Posts Plugin for WordPress, Blogger...